Many homeowners are gaining enough confidence in their financial situation to remodel and renovate their kitchens. A kitchen remodel will enhance your home in multiple ways. However, taking on a DIY approach to kitchen remodels can overwhelm you if you don’t research and plan well.
Homeowners may wish for a cheap kitchen remodel, so it’s tempting to go for Ready-To-Assemble (RTA) cabinets. Resist the urge for cheap, mostly Chinese RTA cabinets; they aren’t as durable. Kraftmaid Cabinets are ideal for your DIY project because they’re high quality, locally guaranteed, and come fully assembled.
DIY kitchen renovation demands more than just basic carpentry skills and the right tools; it also requires thorough planning and research. Here’s a more detailed guide to help you achieve your dream kitchen through a DIY remodel.
Are You Planning A DIY Kitchen Remodel?
1. Set a Budget
Start by researching varying prices for materials and appliances to get an idea of how much your DIY kitchen remodel will cost. Also, learn the four ways to transform your kitchen on a budget.
Then, settle for a budget that you can stick to throughout the project. A realistic budget should always feature a contingency fund to cater for unexpected costs like plumbing or electrical issues.
Also, learn about kitchen renovation vs. refurbishment as you budget and plan for the project.
2. Determine Your Needs and Wants
Make a list of your must-have features, such as:
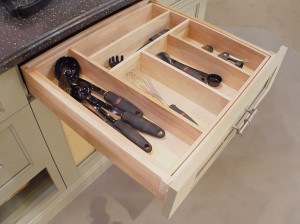
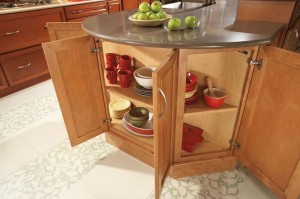
- Ample storage space.
- Energy-efficient appliances.
- A spacious island for meal prep.
- High-quality countertops and backsplash.
Next, make a list of your wants, which may include features like:
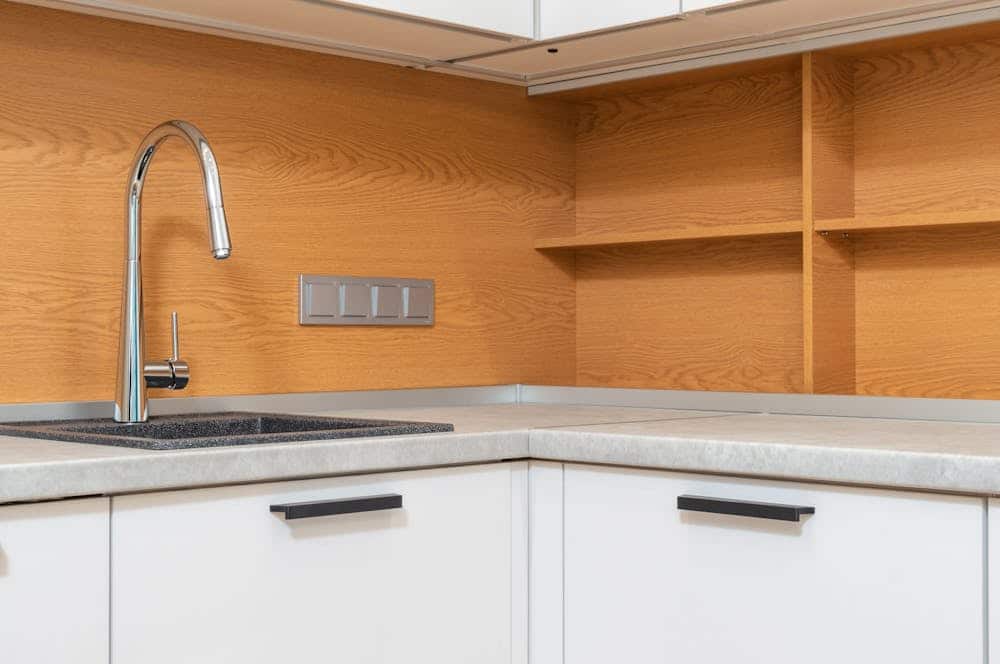
- Under-cabinet lighting.
- A farmhouse sink.
- Smart technology integration.
Go back to your budget and prioritize your needs over wants so you get the most essential elements without overspending.
3. Create a Timeline
Affordable kitchen remodeling demands a timeline to hit milestones and avoid taking too long. Remember, the longer the project takes, the more money you spend eating out or on other temporary living arrangements.
To create a timeline, break down the project into daily must-do lists detailing a chronological flow of tasks from start to finish.
Also, factor in any potential delays, such as waiting for materials to arrive.
4. Research and Plan Your Layout
Before demolishing or adding anything to your kitchen, thoroughly research and plan your layout. Consider factors like:
- Your daily routine and easy access to your sink, cabinets, refrigerator, and stove.
- Traffic flows through the kitchen.
- Adequate counter space.
- Storage options.
If your current layout works or needs minor adjustments, why not focus your resources on updating the technology, cabinets, lighting, and finishes?
AI tools can help you visualize your layout and make changes before the physical work begins. Some programs even let you experiment with different layouts, materials, and colors.
5. Consider Alternatives to a Complete Remodel
If you are wondering “why is a kitchen remodel so expensive?” and your budget doesn’t allow for a complete kitchen remodel, consider alternatives that can still refresh your space without breaking the bank. Some options include:
- Cabinet refacing instead of replacement.
- Updating hardware and fixtures.
- Installing new countertops only instead of a full kitchen overhaul.
Be open-minded to improve your kitchen while staying within your budget constraints.
Choosing the Right Cabinets for Your DIY Kitchen Remodel
Don’t get fooled by online companies that only focus on Ready-To-Assemble (RTA) cabinets. RTA may sound good and cheap to a DIY person. However, every day that your kitchen isn’t operable means more expense to the family budget.
Remember the additional expenses required to purchase all the extra tools to assemble those RTA cabinets. Time is also money, and you’ll be using it to put together cabinets instead of enjoying your new kitchen.
If you think putting together a child’s toy at Christmas time is tough, just wait until you start trying to assemble an entire kitchen with anywhere from 10 to 50 pieces per cabinet.
What About RTA Quality?
Whenever you ask, “Where does the RTA come from?” The answer is more than likely China.
Such long distances add to the time spent shipping and handling the product before it even gets to your home. Also, what happens when you’re not satisfied with the quality of the cabinets? It’s much more challenging to return and exchange products from overseas.
Also, it’s hard to guarantee a long warranty on something you assemble, so RTA cabinets don’t offer a meaningful warranty.
We recommend Kraftmaid Cabinets because of their quality and reputation. Kraftmaid offers over 200 storage solutions, and all the bells and whistles any homeowner can desire.
Kraftmaid Cabinets are American made, so support America and help keep jobs here. American culture of quality goes along with favorable terms, like Kraftmaid’s lifetime warranty.
Cost Considerations
Kraftmaid Cabinets are the perfect solution for that DIY dream kitchen project because they come fully assembled. Pre-assembled cabinets are easier to install than RTA cabinets and don’t require any additional tools or labor costs.
With Kraftmaid Cabinets, what you see is what you get. Plus, with a lifetime warranty, you won’t have to worry about spending more money down the line for replacements or repairs.
At Designer Cabinets, an authorized Kraftmaid Cabinets dealer, we help these cabinets reach you conveniently with minimal markups. We also offer JSI Cabinets, Ultracraft, and Norcraft cabinets.
Essential Tools and Materials for DIY Kitchen Remodeling
You’ll need tools and materials for your DIY kitchen renovation. You’d need even more tools if you opt for RTA cabinets, but we’ve agreed it’s much better to use Kraftmaid Cabinets.
Here are the essential tools and materials you’ll need for your DIY kitchen remodeling project with Kraftmaid Cabinets:
- Screwdriver: A good quality screwdriver set with various sizes and shapes is necessary for installing your cabinets.
- Drill: A drill is essential for drilling holes and securing screws in place. Always have a drill with different bits to accommodate various sizes of screws.
- Measuring Tape: Proper measurements are crucial when installing cabinets. A measuring tape will help ensure accurate placement and alignment.
- Level: This tool helps you align and straighten cabinets and other fixtures.
- Stud Finder: A stud finder will help locate the wall studs for the secure installation of your cabinets.
- Pencil: Marking where the cabinets should be installed on the wall is important. Use a pencil to mark these locations accurately.
- Shims: These are tiny wood or plastic pieces that help to level out cabinets that aren’t perfectly aligned
- Cabinet Hardware: You’ll need cabinet hardware, such as hinges and knobs, for your cabinets. You also need the correct size and type for your specific cabinets.
- Cabinet jack or support brackets (for upper cabinets): These tools help support the weight of upper cabinets during installation.
- Clamps (for holding cabinets in place during installation): These will hold your cabinets in place while you secure them to the wall.
- Caulk and caulking gun: After installing your cabinets, use a caulk gun to fill all crevices between the cabinet and the wall.
- Safety Gear: Don’t forget to wear safety gear, such as goggles and gloves, throughout your renovation project.
Recommended Materials for a Durable and Stylish Kitchen
Some materials may be more durable and stylish than others. Here are a few recommended materials to consider when remodeling your kitchen :
- Solid wood: cabinets made from solid wood have a reputation for durability and timeless appearance. They often withstand wear and tear over the years, and you can refinish them whenever necessary.
- Plywood: This material is popular for cabinet boxes because of its strength and resistance to warping or shrinking. It’s also more cost-effective than solid wood.
- Laminate: This material is budget-friendly and offers various color and style options. It’s also easy to clean and maintain.
- Thermofoil: This material is a type of vinyl that is heat-sealed to MDF (medium-density fiberboard). It’s known for its durability and resistance to moisture, making it a great choice for kitchens.
- Metal: Using metal for your cabinets oozes a modern and sleekness. They’re also durable and easy to clean, though prone to scratches and dents.
- Glass: Glass inserts in cabinet doors can add elegance to your kitchen design. However, they may require more maintenance and are prone to breaking.
Stone or Quartz Countertops: These materials are durable, heat-resistant, and come in various styles and colors. They can also add value to your home.
Step-by-Step Guide to DIY Kitchen Remodeling
Step 1: Demolition and Preparation
For starters, order all the tools and materials you’ll need to satisfy your remodeling goals. Then, clear out all items from your kitchen and prep the area for demolition.
You must safely remove any existing cabinets, countertops, appliances, and flooring. Disconnect the water sources entering the kitchen and switch off the electricity from the meter box.
You already have a plan in mind for your new kitchen layout. Using that, map out the location of appliances, cabinets, and fixtures with precise measurements.
Then, demolish and remove any necessary walls or partitions to create a more open space. Remember, major plumbing or electrical changes may require professional help.
To prevent accidents, only demolish one section at a time. Avoid demolishing reusable materials such as cabinets or countertops if they are in good condition. Instead, donate or reuse them.
Step 2: Installing or Refacing Cabinets
With the demolition complete, it’s time to start building your new kitchen. First, install or reface your cabinets according to your layout plan.
Remember, we’re using pre-assembled DIY cabinets to save time and effort. If you’re refacing your existing cabinets, measure accurately and use the appropriate tools for cutting and attaching new cabinet doors and hardware.
Step 3: Upgrading Countertops and Backsplashes
Install new countertops according to the manufacturer’s instructions for best results.
There’s a generous selection of countertop materials, each with its own benefits and drawbacks. Select a material that fits your budget and style, from granite and marble to quartz or laminate.
Additionally, upgrade your backsplash for a more modern look. Depending on your preference and skill level, you can opt for tile, stone, or even peel-and-stick options.
Step 4: Plumbing and Electrical
Now that the major construction is complete, it’s time to tackle plumbing and electrical work. You’ll need to work on:
- Rerouting and installing plumbing fixtures.
- Connecting water lines and drainage.
- Adding electrical outlets or relocating existing ones for appliances and lighting
Again, consult a professional for any major changes or additions to your plumbing or electrical systems. Safety should always be the top priority when working with these elements.
Step 5: Install Flooring
Your floor should be durable and water-resistant, able to withstand high humidity and frequent spills while you wash and cook. Aesthetics are equally important.
Tiles, hardwood, or laminate are popular choices for kitchen flooring.
Properly measure and cut your chosen material before installing it with the appropriate tools.
Step 6: Finishing Touches
It’s time for the finishing touches after completing the major of your kitchen remodeling. You’ll have to:
- Paint or wallpaper walls.
- Install lighting fixtures.
- Add decorative elements such as shelves or artwork.
Finally, clean up any debris and put away tools to reveal your beautiful new kitchen space.
Why Kraftmaid Cabinets DIY Kitchen Remodel
You know that we are your best bet at getting customized cabinets. At Designer Cabinets, we’re professionals with an A+ rating with the Better Business Bureau so you can TRUST that your cabinets will be delivered to your door or job site without any issues. Our staff has over 110+ years of combined experience helping folks just like yourself.
We recommend Kraftmaid, Ultracraft, Norcraft, and JSI Cabinets. cabinets for your DIY kitchen remodel due to their customizability, ease of installation, and quality of materials.
Get started today; simply email your Kraftmaid design or big box quote and receive a no-obligation, no-pressure, mind-blowing price quote. FREE Quote! Visit our Cabinet specials page to learn more about our current discounts. For an online brochure, visit Kraftmaid Cabinets’ website.