Are you torn between DIY and professional kitchen cabinet painting? That’s a tricky dilemma because you’re actually weighing the advantages and disadvantages of each.
As a homeowner, it’s only natural for you to want to save money by doing things yourself. That said, the level of painting skills required may be above your ability. The time and patience requirements for kitchen cabinet painting can also be significant.
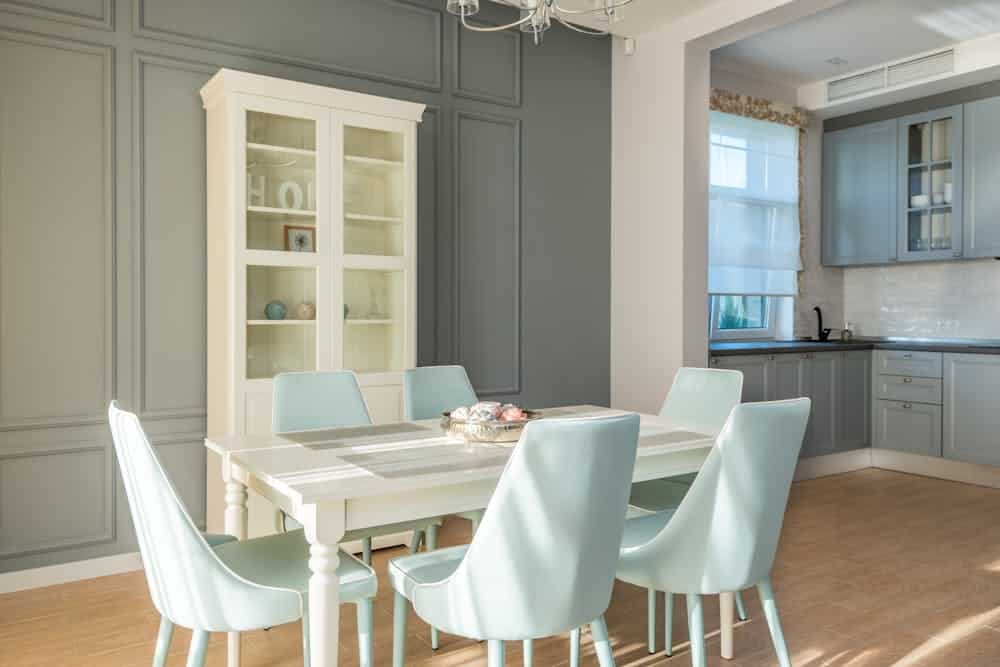
Should you hire someone to paint your kitchen cabinets, or should you do it yourself? This post explores both options, starting with an overview of the painting process.
Understanding What Cabinet Painting Involves
Painting kitchen cabinets involves a more detailed and technical process than painting walls. If you’re not familiar with this level of work, it may be worthwhile to explore professional services in addition to researching the DIY route.
Here’s a quick overview of the cabinet painting process.
1. Preparation
You can’t just get paint and apply it on your cabinets without preparing your kitchen for such a major project.
The first step is to empty all cabinets and drawers. Paint can contaminate food, groceries, and kitchen wares, so you have to clear out everything. Set them aside in another room or cover them with drop cloths.
Next, label, unscrew, and remove all the cabinet hardware, i.e., knobs, handles, and hinges. Please place them in separate bags to prevent them from getting lost or mixed up.
Pull out all drawers and shelves, and take off any paper liner if you have one. Dust them all off and set aside. If they’re too old and faulty, you need cabinet refacing, not painting. You might also consider complete cabinet replacement.
Then, thoroughly clean your cabinets with a degreasing cleaner. The goal is to remove all grease, food stains, and grime from all cabinet surfaces. Be sure to clean the inside as well, and if you have glass inserts, clean those too.
2. Sanding
The golden rule of painting is that the paint has to become one with your cabinet surface. That’s why you started by cleaning, degreasing, and rinsing all your cabinet surfaces. But it wasn’t enough.
Cleaning eliminates impurities that come in between the paint and your cabinet surface, ruining the bond. You have to go further and sand all the surfaces you intend to paint.
Sanding helps remove previous layers of paint or stain and gives the surface a rough finish. Paint adheres much better to rough surfaces because it has more to grab onto, resulting in a smoother and longer-lasting finish.
Sanding is a delicate skill because the goal is to rough up the surface, not damage it. You need the right tools, grit, and techniques to achieve this.
3. Priming
Good things take time, and priming is one of them. It may seem like an extra step, but it’s essential for a high-quality paint job.
Priming prepares the surface for paint by creating a sealant layer that helps prevent stains, moisture, and other substances from seeping through the paint. It also provides better adhesion for the topcoat, resulting in a more durable finish.
You can’t prime a dirty cabinet surface and bypass the first two steps. You have to wash and sand it beforehand. If you prime over dirt and old paint, the primer won’t adhere properly, leading to a less-than-perfect final result.
Your primer must be compatible with both the type of paint and your cabinet material. For example, you need a water-based primer specifically designed for laminate surfaces if you’re using water-based paint on laminate cabinets.
Primer colors also matter. If you’re painting your cabinets a lighter color, consider using a white primer to ensure the paint applies smoothly and evenly. If you’re going for a darker color, opt for a tinted primer that matches or is slightly darker than your paint color.
4. Painting
It’s time to start painting! Here are the steps to follow:
- After the primer dries, lightly sand all rough areas with fine-grit sandpaper.
- Clean off any dust from sanding with a tack cloth.
- Apply one coat, and let it dry before applying the second coat. Use light strokes, and don’t overload your brush or roller with paint.
- Embed fancy designs or stencils onto your paintwork if you’re into artistic expression. Use painter’s tape to prevent any paint from bleeding.
- Once you’re satisfied with your painted surface, ensure it’s dry before touching it or painting an extra coat on top.
5. Sealing and Finishing
Once your paint has completely dried, it’s time to seal it. Use an appropriate finish to protect your paintwork and enhance the aesthetics.
- Select a clear coat or finishing product that’s suitable for the type of paint you are using. For example, if you used an oil-based paint, choose a clear, oil-based coat.
- Rely on a high-quality and well-maintained brush or roller for an even coat. Use light pressure to avoid creating air bubbles or streaks in the finish.
- Give every coat enough time to dry before painting over it.
Painting Tools and Equipment You’ll Need
Painting kitchen cabinets requires both specific skills and a range of tools and materials. If you find that you’re missing key items or experience, it may be beneficial to evaluate whether DIY is the most practical approach for your situation.
You need the following tools and equipment to paint your kitchen cabinets:
- Sandpaper.
- Paint scraper.
- Degreaser solution.
- Spray paint.
- Screwdriver.
- Painting tape.
- Drop cloth or newspaper.
- Paint brushes or rollers.
The Protective Gear You’ll Need
You’ll also need protective gear to keep yourself safe from any chemicals or paint fumes. Here’s what you’ll need:
- Safety goggles.
- Face mask.
- Gloves.
Level of Painting Skills Required
Before diving into the necessary painting skills, it’s helpful to assess whether the cost of tools and materials aligns with your budget and goals for the project.
The Learning Curve Is Steep
You can’t just wake up and decide to paint like someone who’s done it for years. You’ll quickly find out skills are needed when you encounter:
- Visible brush marks.
- Uneven paint coat.
- Drips and runs on your walls or ceiling.
- Paint peeling off.
The learning curve is steep, but patience and practice will get you there.
Basic Skills You’ll Need
- How to hold a brush or roller correctly.
- How to cut in around corners or edges.
- Rolling paint on the wall evenly using overlapping strokes.
- Painting from top to bottom and edge to edge.
If you’ve never painted before, don’t panic! You need time to pick up these skills from online tutorials and articles. (like this one.) You’ll also need to practice multiple times before you can become a decent painter.
Superior Painting Skills
Professionals often undergo training and accumulate extensive experience, making them more skilled and equipped than the average person. They’re also talented and passionate, equipping them to:
1. Stenciling
Consider using stencils to produce beautiful patterns on your walls or canvas. This technique is easy, fun, and perfect for beginners.
2. Sponge painting
Sponge painting gives a unique texture to your walls or canvas. It’s also helpful when experimenting with various colors and effects.
3. Glazing
This painting technique involves mixing paint with a glaze medium to create a translucent effect.
4. Blending
Can you imagine blending colors like a pro? Can you create a smooth transition from one color to another?
5. Spray Painting
Should you spray paint or hand paint kitchen cabinets? If you’re unfamiliar with these methods, this project may be better suited to experienced painters or professionals.
Time and Patience Requirements
Painters often brag about being attentive to details. However, the one quality all painters must have is patience. They literally have to watch the paint dry, but it’s bigger than that. Every step involved in painting kitchen cabinets demands patience.
How long does it take to paint cabinets? It depends on many factors, including how big the job is, what type of paint and tools are used, and how long you can commit to working on it.
You need patience during:
Cabinet Removal and Preparation
Before you paint your kitchen cabinets, start by removing them from the wall. It’s a tedious process that requires careful handling of cabinets and all their contents. You have to remove all the hardware, including hinges, screws, and knobs.
Surface Prep
As we agreed earlier, you need to clean and dry all surfaces before painting.
You’ll need sandpaper or an electric sander, a damp cloth, and primer for this stage. It might take some time to complete, as you have to do it thoroughly and let everything dry.
Drying Time Between Coats
One snarky comment you’re likely to get when you invite a snobby person to activities is, ” I’d rather watch paint dry than hang out with you.” It suggests that you’re more bored than watching paint dry!
It takes patience to watch paint dry, and you have to be content spending time in between coats. You can’t rush the process, or the end result won’t be as smooth.
How long you need to wait for coats to dry depends on the:
- Type of paint you’re using.
- Temperature.
- Humidity.
It’s best to follow the instructions on the paint can.
Reassembly and Finishing Touches
Once the paint has fully dried, it’s time to reassemble any fixtures or furniture you removed from the painting. Put back the outlet covers, light switch plates, and doorknobs, then reinstall cabinets and shelves.
Consider adding some finishing touches such as:
- New curtains or blinds.
- Decorative pillows or throws.
- Wall art or frames.
- Freshly cleaned carpets or rugs.
DIY vs. Professional Kitchen Cabinet Painting
Pros of DIY
- It can save you money.
- Personal satisfaction of completing a project.
- Flexibility in choosing kitchen cabinet paint colors and finishes.
Cons of DIY
- The price you’ll pay to buy or hire necessary tools.
- It can be time-consuming and labor-intensive.
- Lack of experience or skill may result in a less professional outcome.
Pros of Hiring a Professional
- A professional painter will have the necessary experience and expertise to achieve a polished finish.
- Time-saving, as the project will be completed efficiently and effectively.
- Use of high-quality tools and materials.
Cons of Hiring a Professional
- Higher upfront cost.
- Need to vet professionals.
When It Makes Sense to Hire a Pro
- For a sprayed-on, factory-like finish.
- You’re on a tight schedule and need quick project turnaround.
- The project is large-scale or complex.
- High-end kitchen? You have minimal margin for error.
- Large kitchen with many cabinets? Your time matters.
- Planning to sell your home? First impressions matter, and the stakes are too high.
Final Thoughts: Making the Right Choice for Your Kitchen
After reviewing how to repaint kitchen cabinets, consider whether your current skill set, time availability, and access to tools support taking on the project yourself. While DIY can be rewarding, it’s important to align your expectations with the scope and demands of the task.
Ultimately, it depends on your circumstances and priorities. If you have a high-end kitchen with expensive materials and finishes, it may be even more beneficial to invest in professional help to ensure the job is done correctly.