Cabinet liners are often overlooked, but they’re a necessity if you want to protect the inside of your cabinets and drawers. Folks spread these thin sheets of rubber, plastic, cork, or fabrics over their cabinets for protection, decoration, and hygiene.
The best way to line kitchen cabinets depends on many factors, from the type of cabinet liner material to personal preferences and needs. You may even wonder if you should line your kitchen cabinets at all, and the answer is yes!
Here’s a complete guide on how to line kitchen cabinets. Let’s start with the benefits of using cabinet liners and explore the different options available.
Why Should You Line Your Kitchen Cabinets?
1. Protection from Spills and Stains
The main reason homeowners love cabinet liners is the extra protection layer against spills, stains, and moisture.
Kitchens are the busiest parts of any household because of the cooking and washing that goes on, attracting food spills, splashes, and falling utensils.
By lining your cabinets, you can easily clean up any spills. Cabinet liners also minimize a common kitchen issue (water damage) around sinks and dishwashers. As long as the leaks and spills aren’t too massive and don’t sit too long, many of the sturdier cabinet liners can prevent the swelling that can happen to unprotected cabinets.
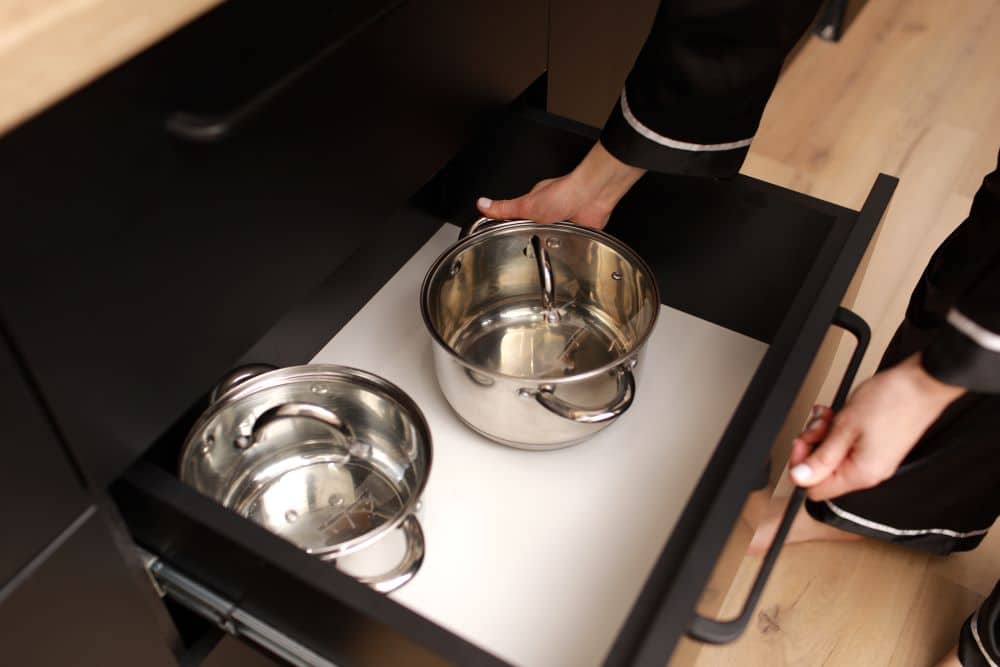
Kitchenware like pots, pans, plates, and utensils can cause scratches and dents on cabinet surfaces over time. Liners offer extra cushioning, absorbing some of the impact.
2. Aesthetics
How do liners beat contact paper on cabinets?
Lining kitchen cabinets gives you unrestricted creative freedom to embellish and change the color palette of your space. There’s a generous selection of various patterned liners, solid colors, or even transparent ones.
Save on major kitchen remodeling costs by using cabinet liners to switch up the look and feel of your cabinets. It’s a quick, affordable, and non-permanent solution.
3. Hygiene
Dust, grease, and food particles can accumulate inside cabinets over time. If left unchecked, the mess can attract pests and bacteria.
Cabinet liners make it easier to maintain a clean and hygienic kitchen. They barricade your cabinet surfaces from the shard edges of your utensils. Some also help prevent dust and grime buildup as they’re easy to remove, clean, and reinstall.
Types of Cabinet Liners
The following are various types of cabinet liners available, and each is suited for specific needs and preferences.
1. Shelf Liner Paper
Shelf liner paper is a slim, adhesive-backed material that’s easy to cut to fit different cabinet sizes. It provides a non-slip surface for items placed on shelves and is also easy to clean with a damp cloth.
Shelf liner paper comes in various designs, colors, and patterns, so it’s popular among homeowners seeking to tweak their kitchen aesthetics.
2. Adhesive Liners
These liners are similar to shelf liner paper, but they have a stronger adhesive backing that provides better grip and hold. These liners come in rolls or pre-cut sheets. They’re also ideal for high-traffic areas.
Remember, adhesive liners are water-resistant, making them suitable for damp or humid environments. They’re also durable and can withstand heavy items without slipping or tearing.
3. Non-Adhesive Liners
Non-adhesive liners offer a more traditional approach to cabinet lining. The idea behind these liners is to provide a removable and washable layer of protection for your cabinets. They’re available in various materials such as:
- Rubber.
- Cork.
- Fabric.
Non-adhesive liners are ideal for those who prefer a non-sticky option or want to avoid any adhesive residue on their cabinets. However, they may not provide the same level of grip as adhesive liners.
4. Wire Shelf Liners
Wire shelf liners are specifically designed for wire shelves, providing a flat surface for items to rest on without falling through the gaps in the wires. Wire lines may be built from various materials, like plastic, rubber, or vinyl, and are easy to cut to fit different-sized shelves.
Wire shelf liners are also ideal for pantries, closets, and laundry rooms. They allow for better airflow and prevent dust buildup on shelves.
5. Decorative Liners
These liners are ideal when you want to refresh your kitchen ambiance without breaking the bank with costly renovations. Decorative liners are so diverse in patterns, colors, and textures that you can easily find one to match your kitchen decor.
Some popular types of decorative liners include:
- Floral prints.
- Geometric designs.
- Faux wood grain.
They also come in various materials such as contact paper, vinyl, and fabric. Don’t forget, the looks are in addition to all other conveniences that come with cabinet liners.
How to Line Kitchen Cabinets: Step-by-Step Guide
Step 1: Measure Your Cabinets
You can’t buy your liners and use them economically if you don’t start by measuring your cabinets.
Calibrate the width, length, and height of every shelf in your cabinets. Remember, there are interior and exterior surfaces, so be particular where you measure.
Step 2: Choose the Right Liner Material
Cabinet liners differ by material. The perfect liner for a wire shelf may not be suitable for an adhesive or decorative one, and vice versa.
Consider the function of each cabinet and your aesthetic preferences when choosing the right material.
Step 3: Clean and Prep Your Cabinets
How do you make it stick? You begin by cleaning the cabinet surfaces you want to line.
Remove any existing liners, and clean the shelves with warm water and liquid soap. Then wipe them dry and wait a few minutes so all moisture escapes.
Step 4: Cut Your Liner
With a ruler in hand, measure the exact measurements to cut, referencing the cabinet surface dimensions.
Always leave a very small margin for trimming if needed for adjustments. Then, cut the liner with a sharp pair of scissors or a utility knife.
Step 5: Lay Down Your Liner
Now, it’s time to install your liners. Some liners come with adhesive backing, but if you have a non-adhesive liner, use double-sided tape or spray adhesive for a better hold.
For starters, place one end of the liner on the back of the shelf and slowly roll it out towards the front edge. It will smooth out any bubbles or creases along the way.
Tips for Choosing the Best Cabinet Liner
1. Consider the Cabinet’s Purpose
Think about what items you will be storing in your cabinets. For example, if you are using the cabinet to store dishes or glasses, a non-slip liner with grip would be ideal to prevent any accidental slips and breakage.
What about pantry vs. under-sink cabinets? For pantry cabinets, a moisture-resistant liner would be best to protect against spills and leaks. Under-sink cabinets require waterproof liners for extra protection.
2. Know Your Liner Materials
As mentioned before, your choice of liner material matters.
- Plastic liners are long-lasting and easy to clean. On the downside, they’re sometimes slippery.
- Rubber liners offer excellent grip but may not be suitable for all surfaces.
- The perks of cork liners are extra cushioning and absorbency. On the downside, they’re more challenging to clean.
- Foam liners offer both grip and cushioning, making them a versatile choice.
3. Consider Your Cabinets’ Style and Kitchen Décor
While cabinet liners may seem like a minor detail, they can drastically alter your kitchen’s overall look and feel.
You want to harmonize your kitchen’s architectural style with your color palette, so go for a liner that complements your cabinets and kitchen décor.
Don’t be afraid to mix and match various liners for different cabinets as long as they all have a cohesive look.
4. Ease of Installation and Maintenance
Choose an easy-to-install liner that can be cut to fit your cabinets’ dimensions. It will save you time and effort in the long run.
As for maintenance, opt for easy-to-clean liners. It’ll make it easier to keep your cabinets looking pristine.
How Often Should You Replace Cabinet Liners?
You should replace liners when they outlive their usefulness. Look for signs of wear and tear, such as stains, tears or visible damage. If your liner no longer provides adequate protection or grip, it’s time to replace it.
Also, consider replacing liners when changing the contents of your cabinets. You may need a different type of liner if you’re storing different items or if your current liner is too stained or damaged.
Common Mistakes to Avoid When Lining Cabinets
1. Using Liners That Are Too Thin
Lean liners are less effective at protecting your cabinets from spills and scratches. They also tend to wrinkle, tear, and shift, making them more of a hassle than a helpful addition.
2. Measuring Once and Cutting Twice
Always double-check your measurements before cutting your liner. It’s better to have a little extra liner than to cut so much that you must start over with another liner. Be sure to fill kitchen cabinet gaps while you’re measuring!
3. Skipping the Cleaning and Prep Step
Before installing your liners, thoroughly clean and dry the inside of your cabinets. Skipping that step compromises your liners’ ability to stick to your cabinets. Then, the consequences would be bubbling, or shifting, or both.
4. Not Checking for Air Bubbles
As you apply your liners, take time to smooth out any air bubbles. These can cause the liner to shift or lift, leaving your cabinets unprotected.
5. Using the Wrong Type of Liner
Some liners are better suited for certain types of cabinets or applications. Adhesive liners don’t stick satisfactorily in damp environments, while non-adhesive ones may not provide enough grip for heavy items.
Do your homework to settle on a liner that suits your needs and style.
Final Thoughts
Adding liners to your cabinets is a simple and affordable way to protect them and make them more functional. Avoid the common mistakes we listed earlier so your liners stay in place, providing maximum protection.
For optimal results, remember to check and replace your liners regularly.